Your Custom Text Here
Macarons with Silpat!
Baking is the collision of precision and accident. I think that's why I love it so much. I feel the same way about myself. I'm full of opportunity, but I never seemed to have gotten it right. And that's okay. I'm learning to be okay with that.
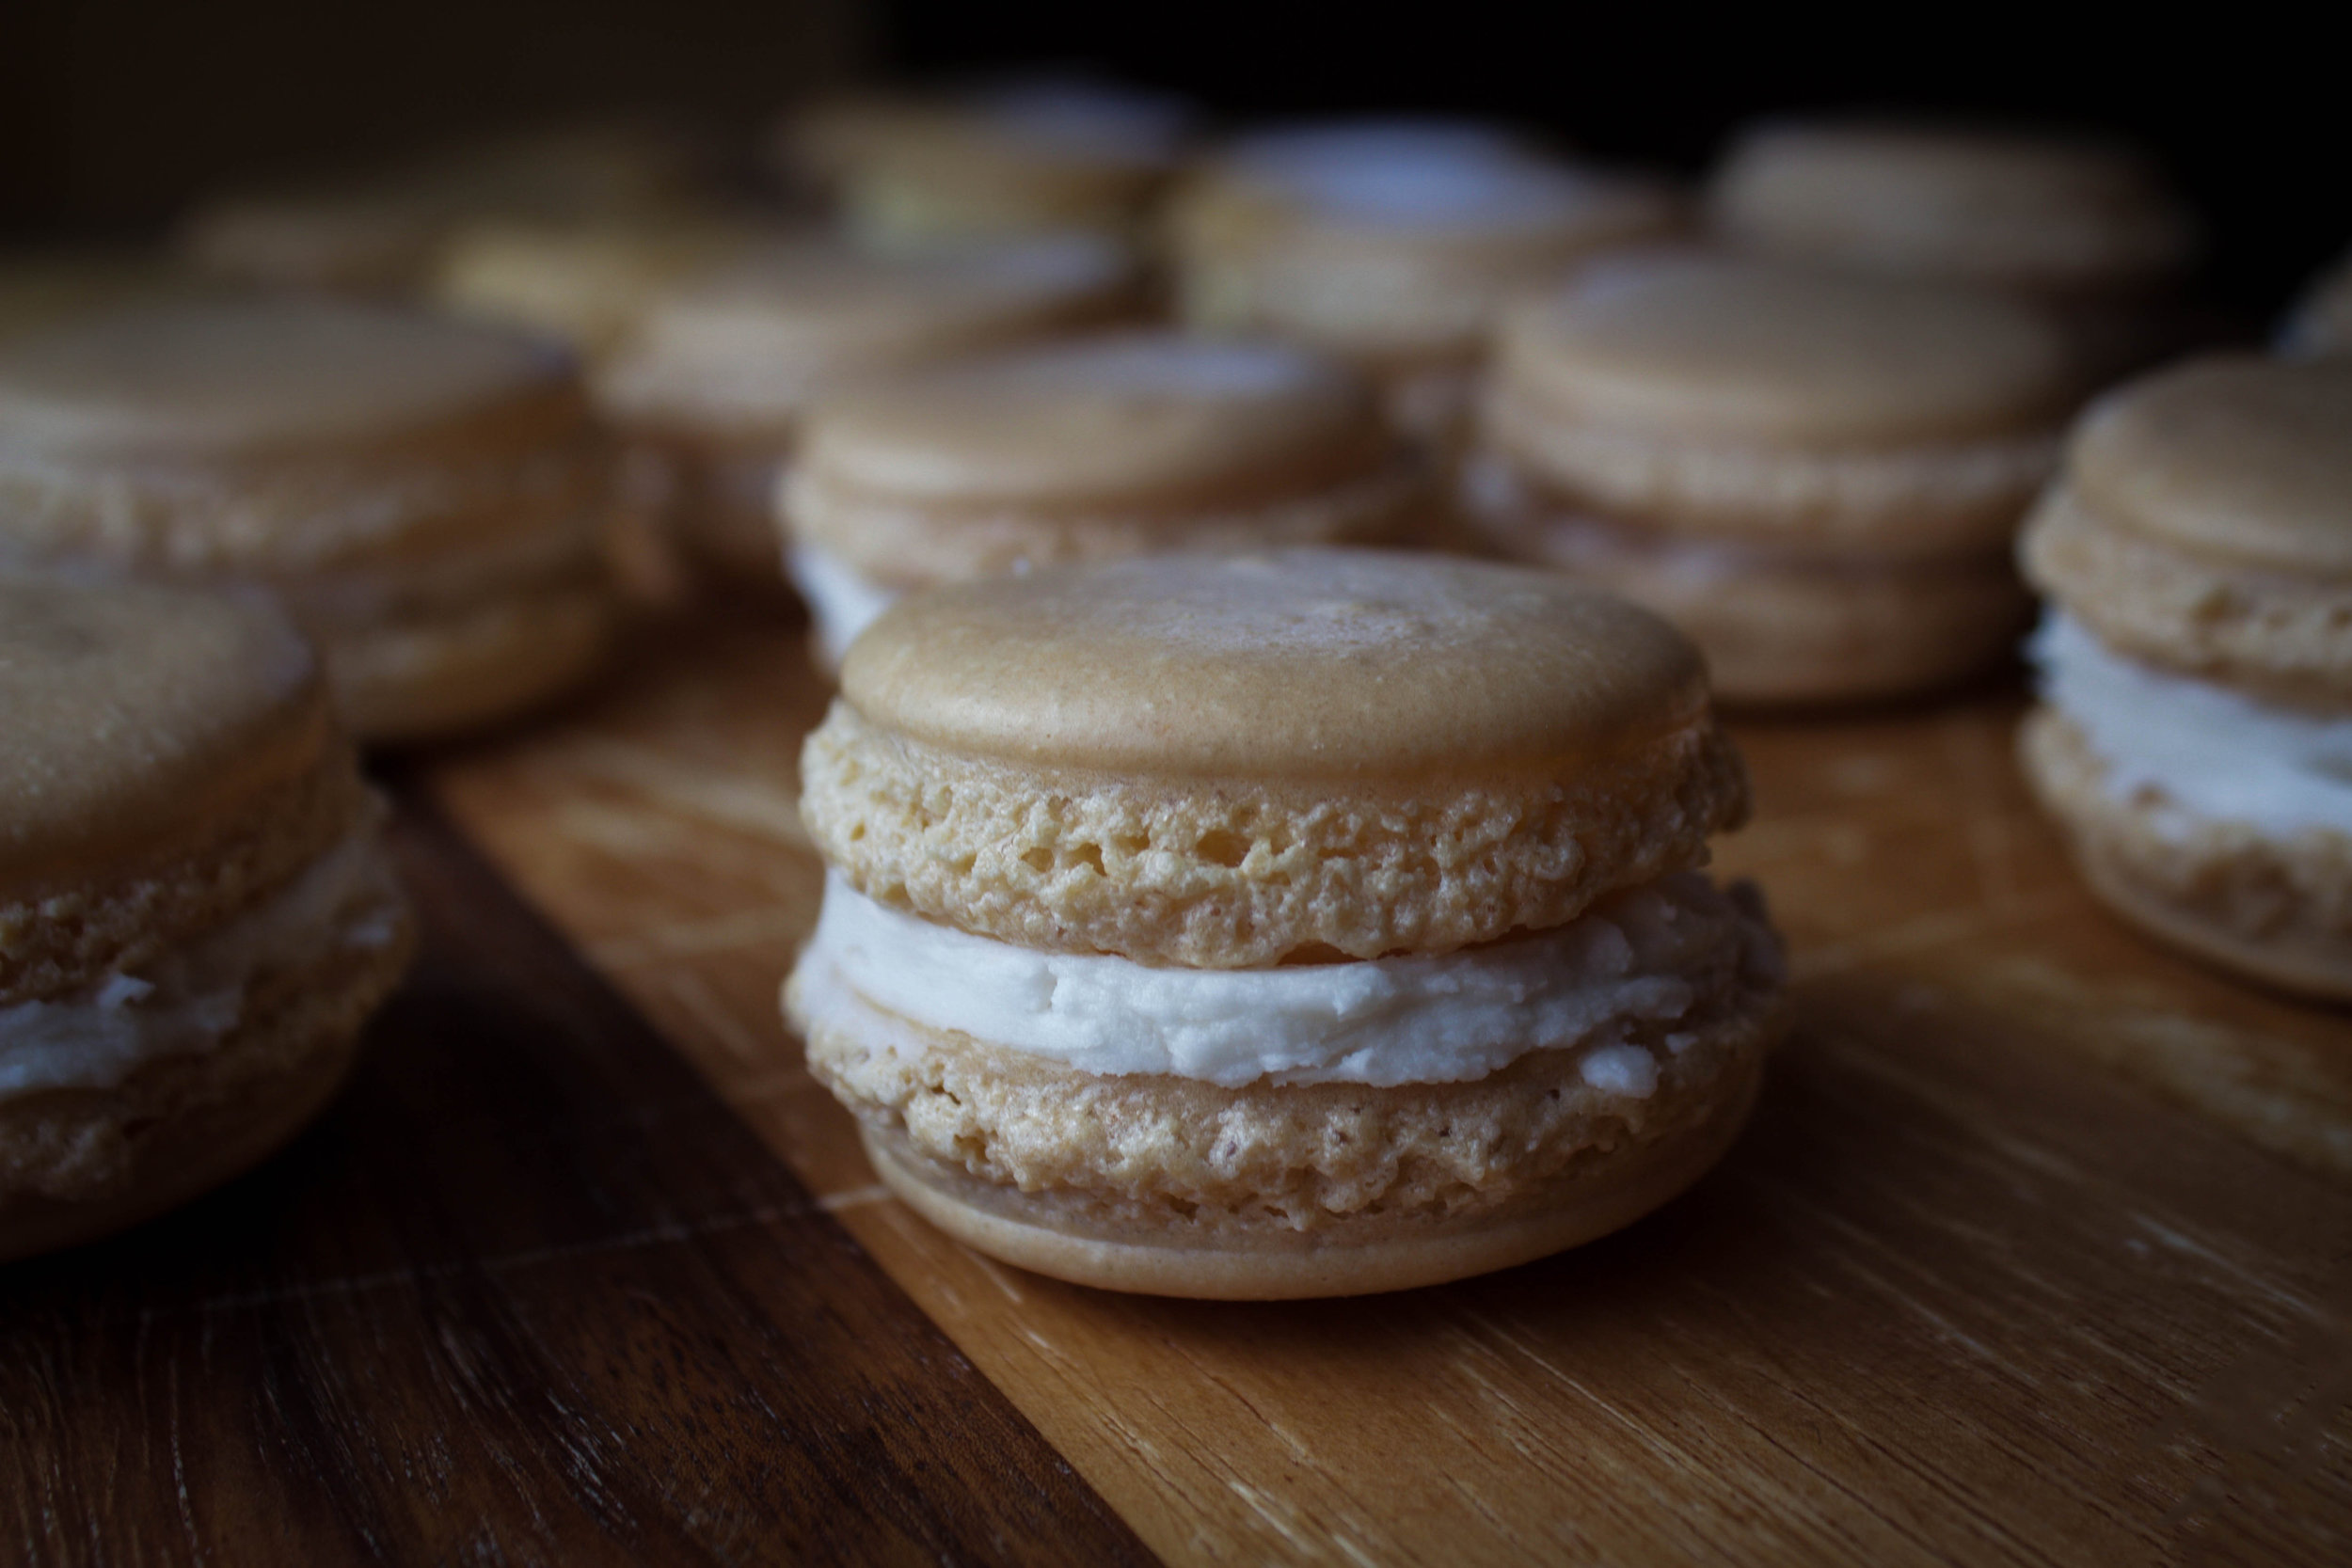
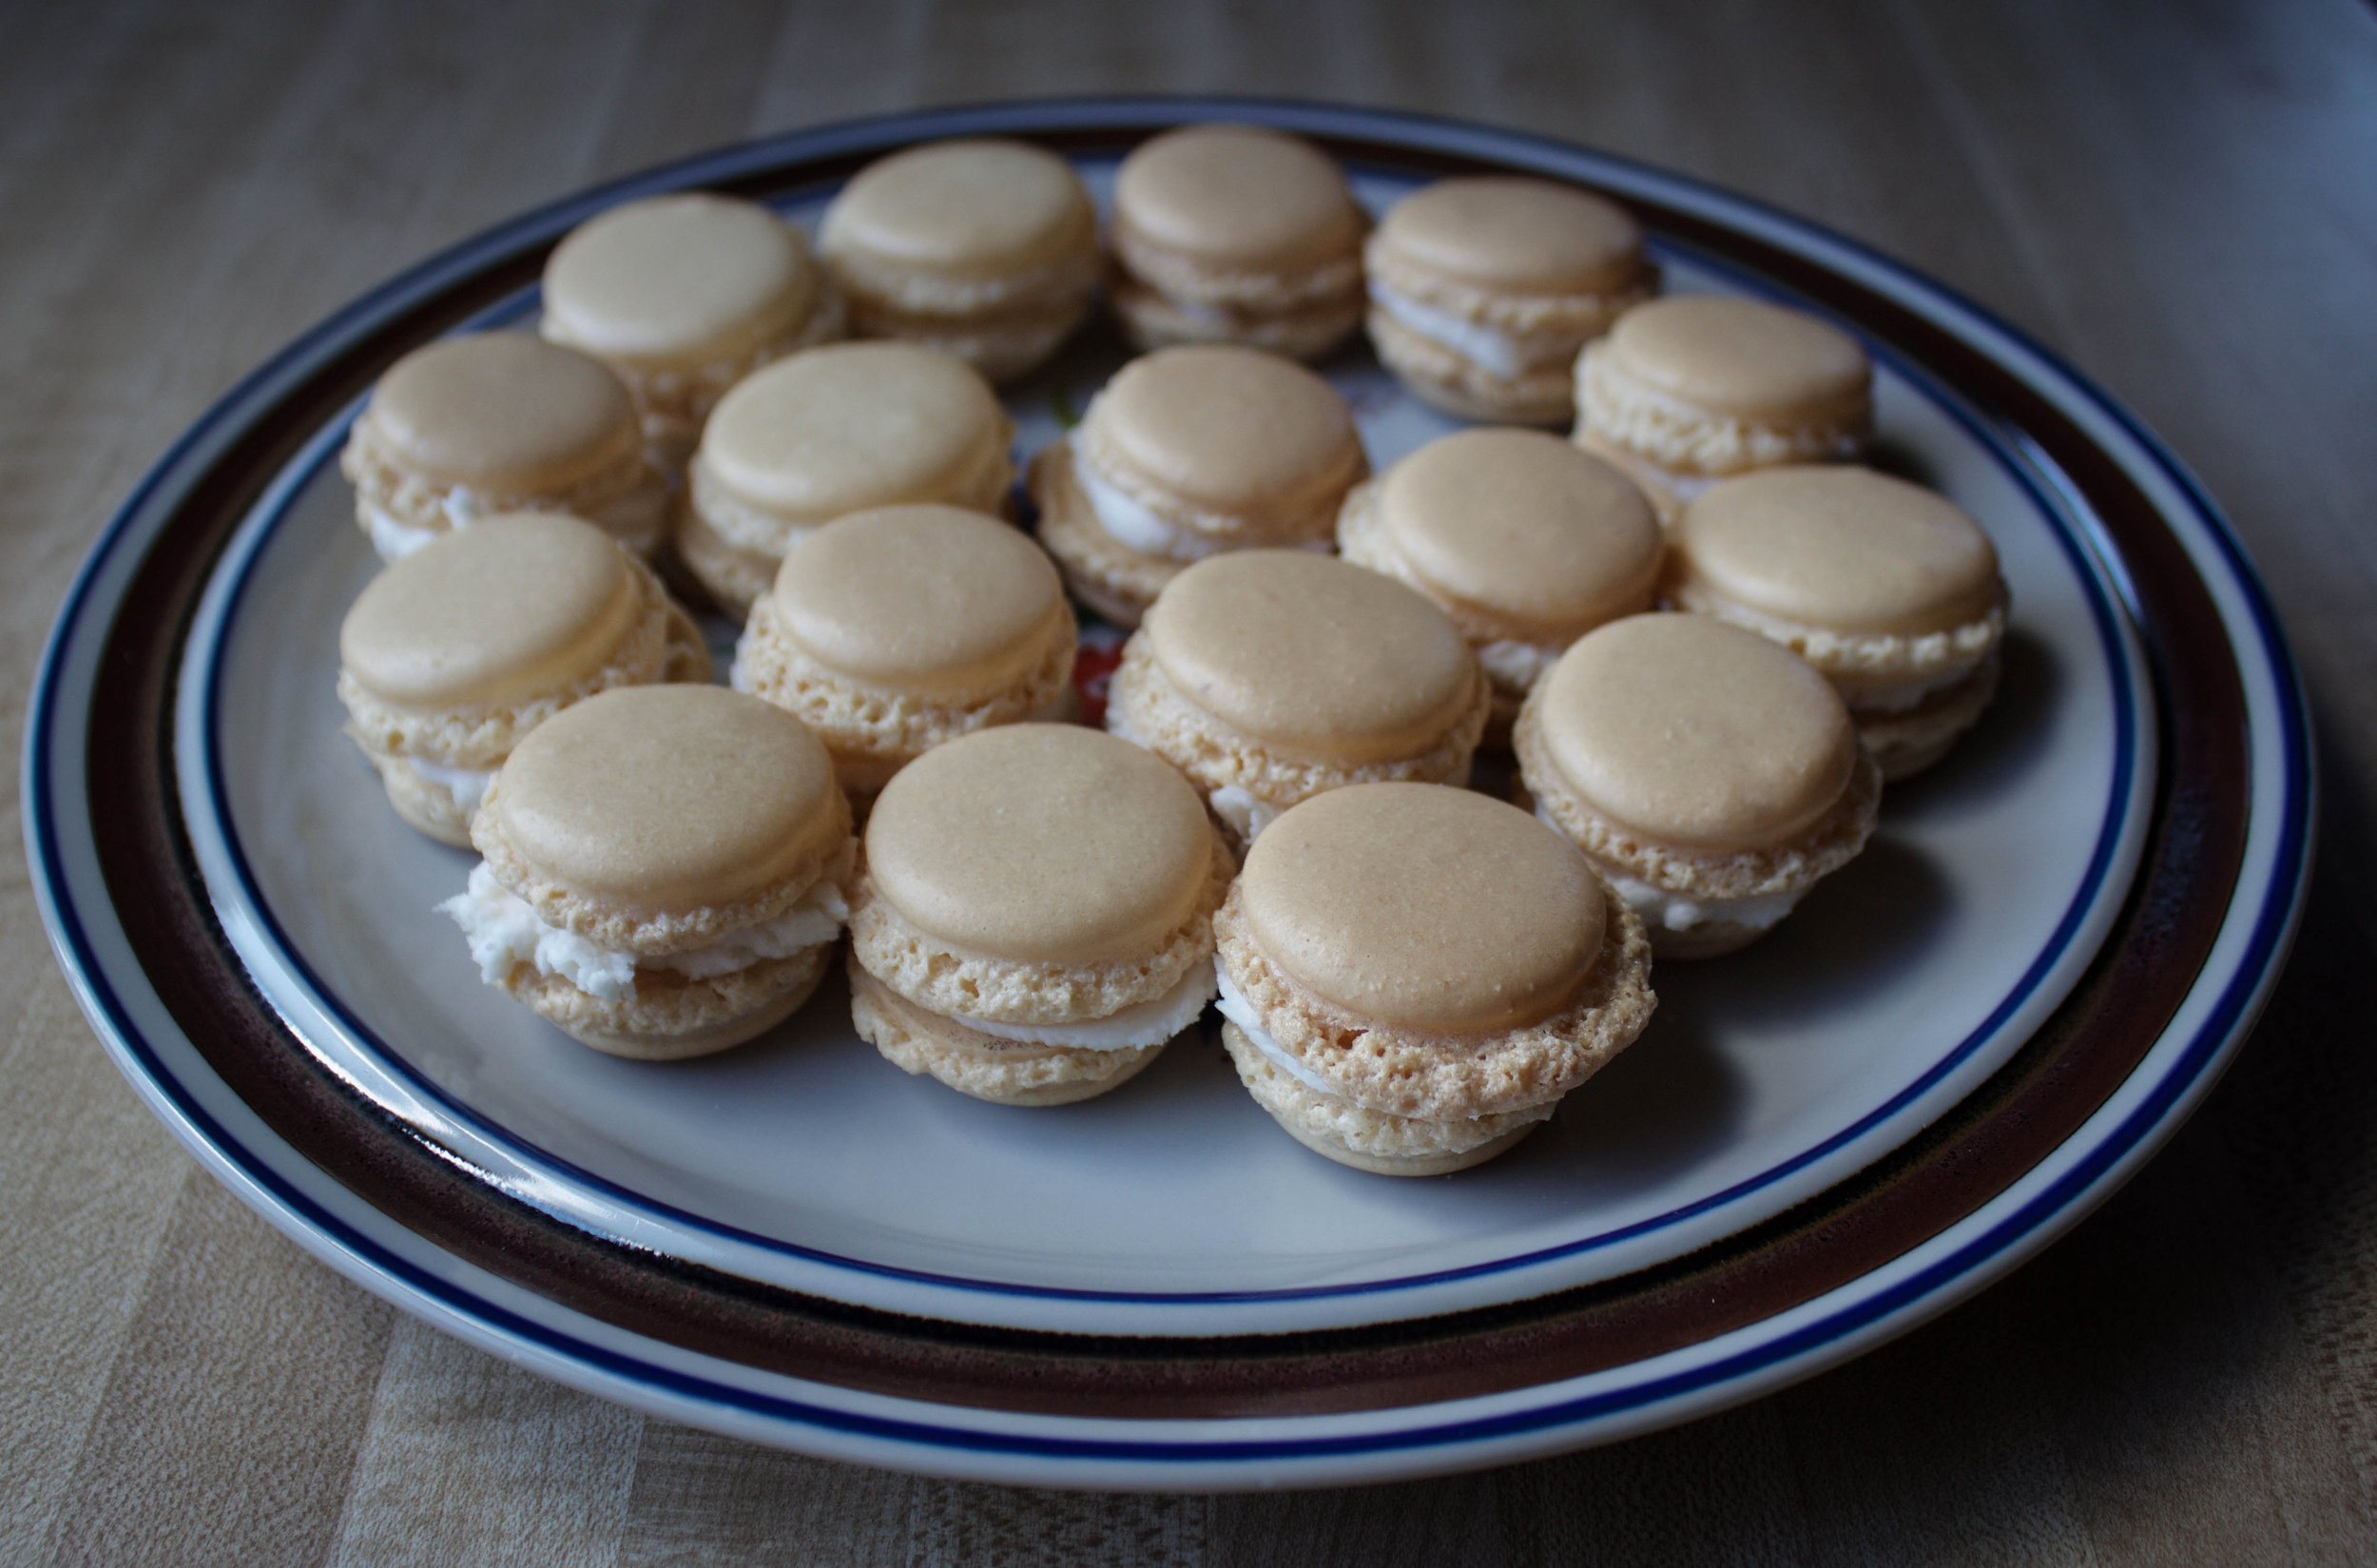
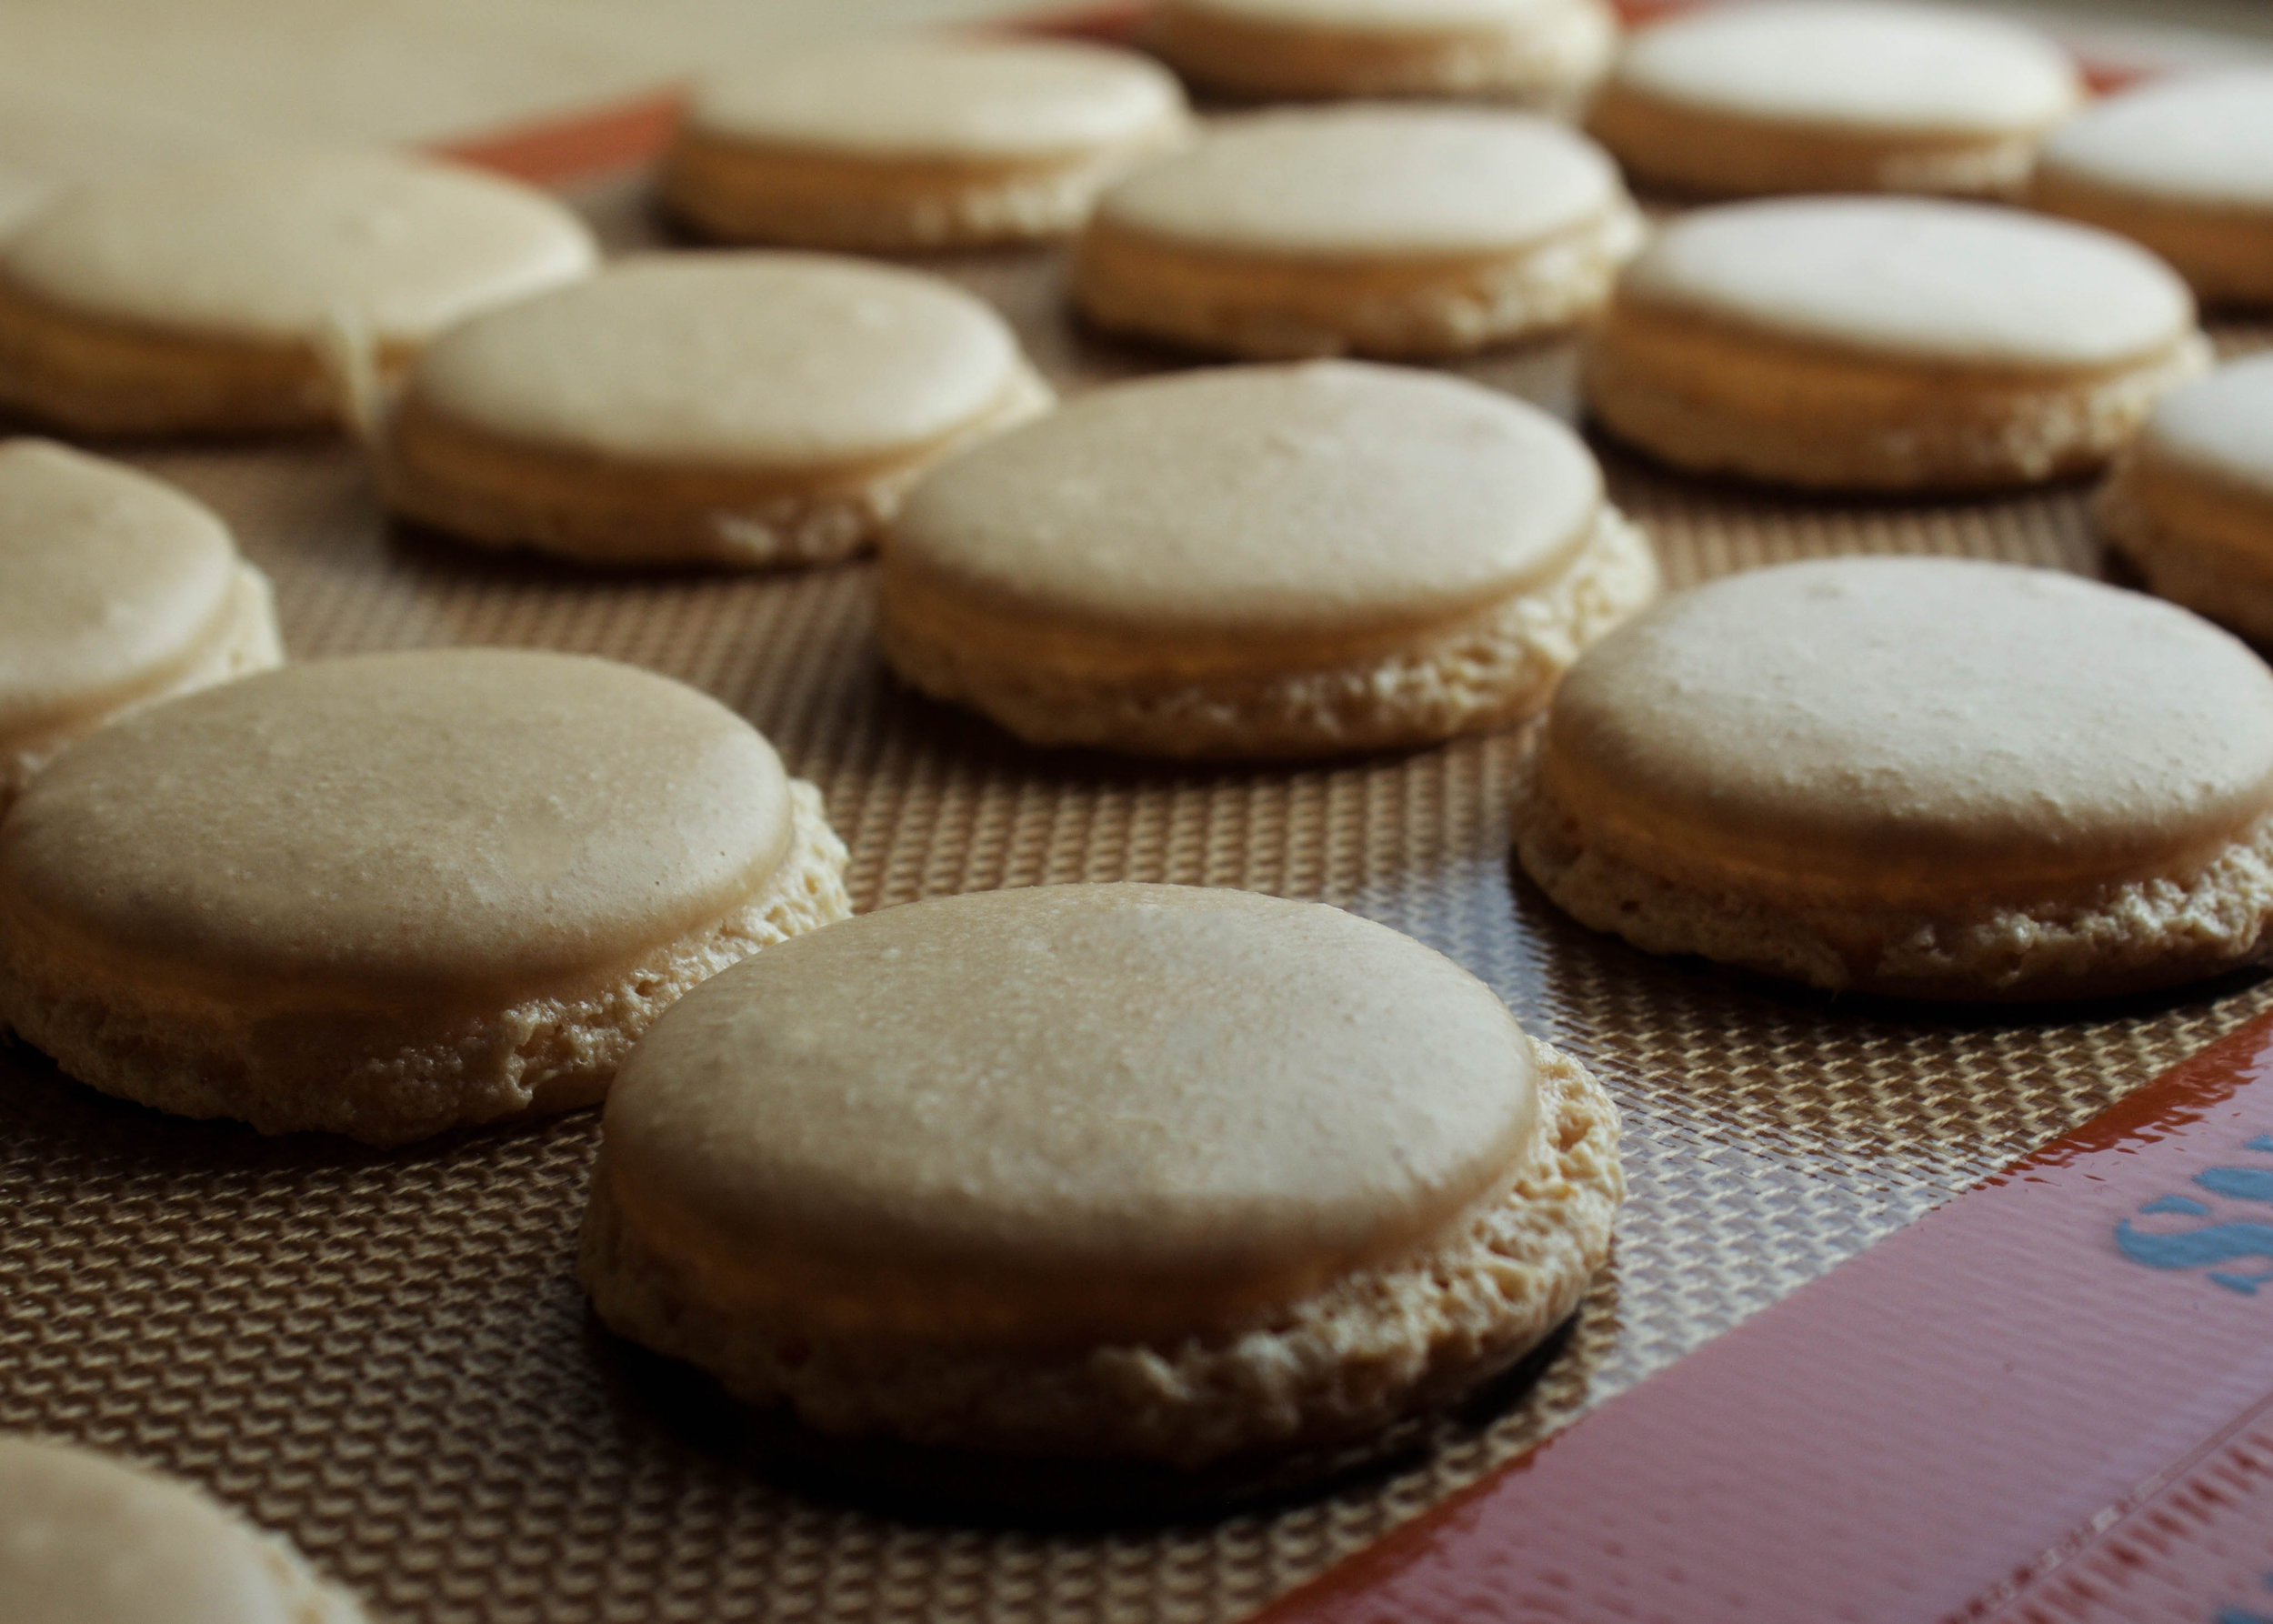
The small bumps on the tops of the macarons make me smile. I've got a few, too. And I think about the beauty of these imperfections and the small cherry moles that creep on my arm and the crooked teeth of our dogs and I love these small details that make them so much more worth savoring.
I've never made macarons before. I wasn't scared, but I was unsure. My best friend got me a kit maybe four years ago and it sat, unused. I used to be afraid of failure, so I think that's why I never opened it. But when Silpat asked me to use their mats to try again, I held off until I had the time. I thought it would take hours, maybe a day even. But it took maybe 60 minutes from start to finish. And they were perfect in their airy way, brittle and fragile and broken around the edges. It made it so much more worth savoring that way.
Macarons!
Ingredients:
- 1 cup confectioner's sugar
- 1 cup fine-ground almond meal
- 3 egg whites, room temperature
- 1 lemon wedge
- Pinch of salt
- 1/4 cup white sugar
- Extracts and dye of your choice (see notes)
Directions:
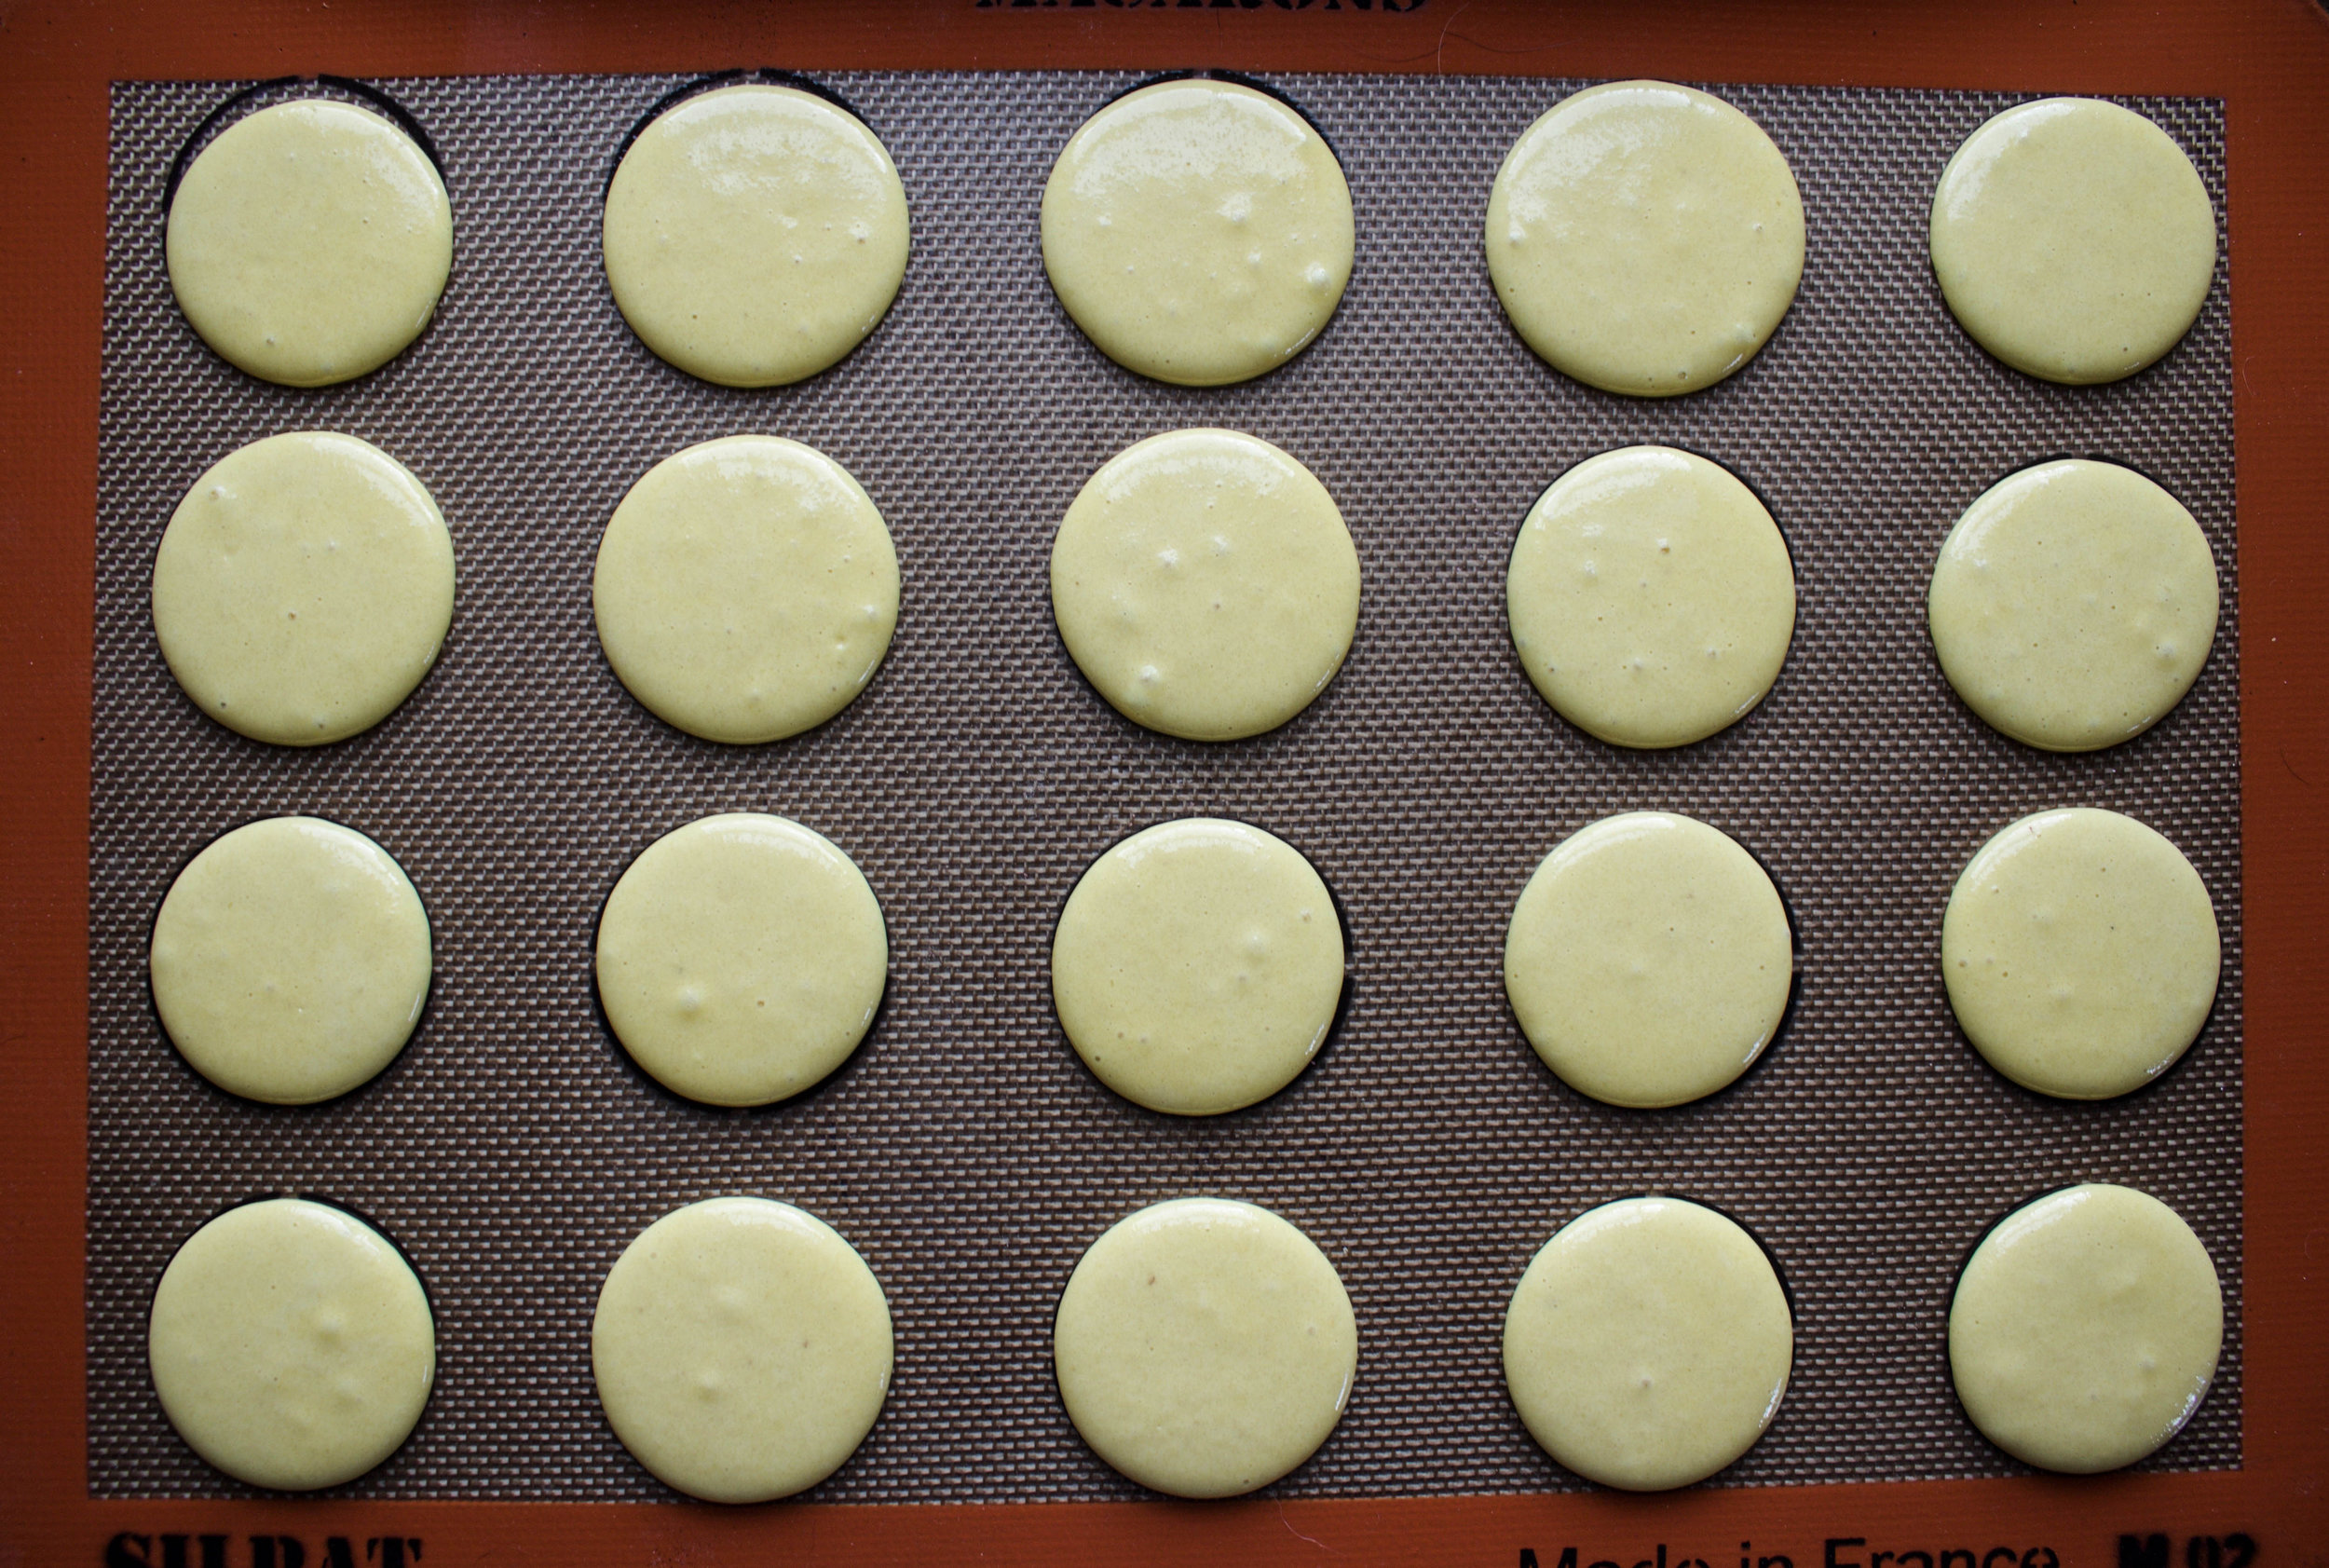
- Prepare a 13"x18" cookie sheet with your Silpat Macaron Mat or parchment paper
- Sift together confectioner's sugar and almond meal 4 times until well aerated
- In the bowl of a stand mixer, rub your lemon wedge on the inside
- Whisk eggs on high until peaks begin to poke up
- Add salt and sugar and mix until stiff peaks form
- Add extracts and dye, mix for 15 or so seconds until fully incorporated
- Using a rubber spatula, fold meringue into dry mixture (make sure to be gentle so not to deflate the mixture more than you have to)
- Transfer batter to a piping bag and pipe into center of the circles (if using macaron mat). Keep bag straight up and apply an even amount of pressure. Leave about a centimeter perimeter, as batter will expand as it settles and as it bakes
- Allow batter to rest for 30 minutes at room temperature
- Preheat oven to 300*F
- Bake for 25 minutes, opening at the 15 minute mark to release a little steam and to check on edges
- When done, tops will be hard and a little glossy and bottoms will have a crust
- Let rest on mats before transferring for a couple minutes
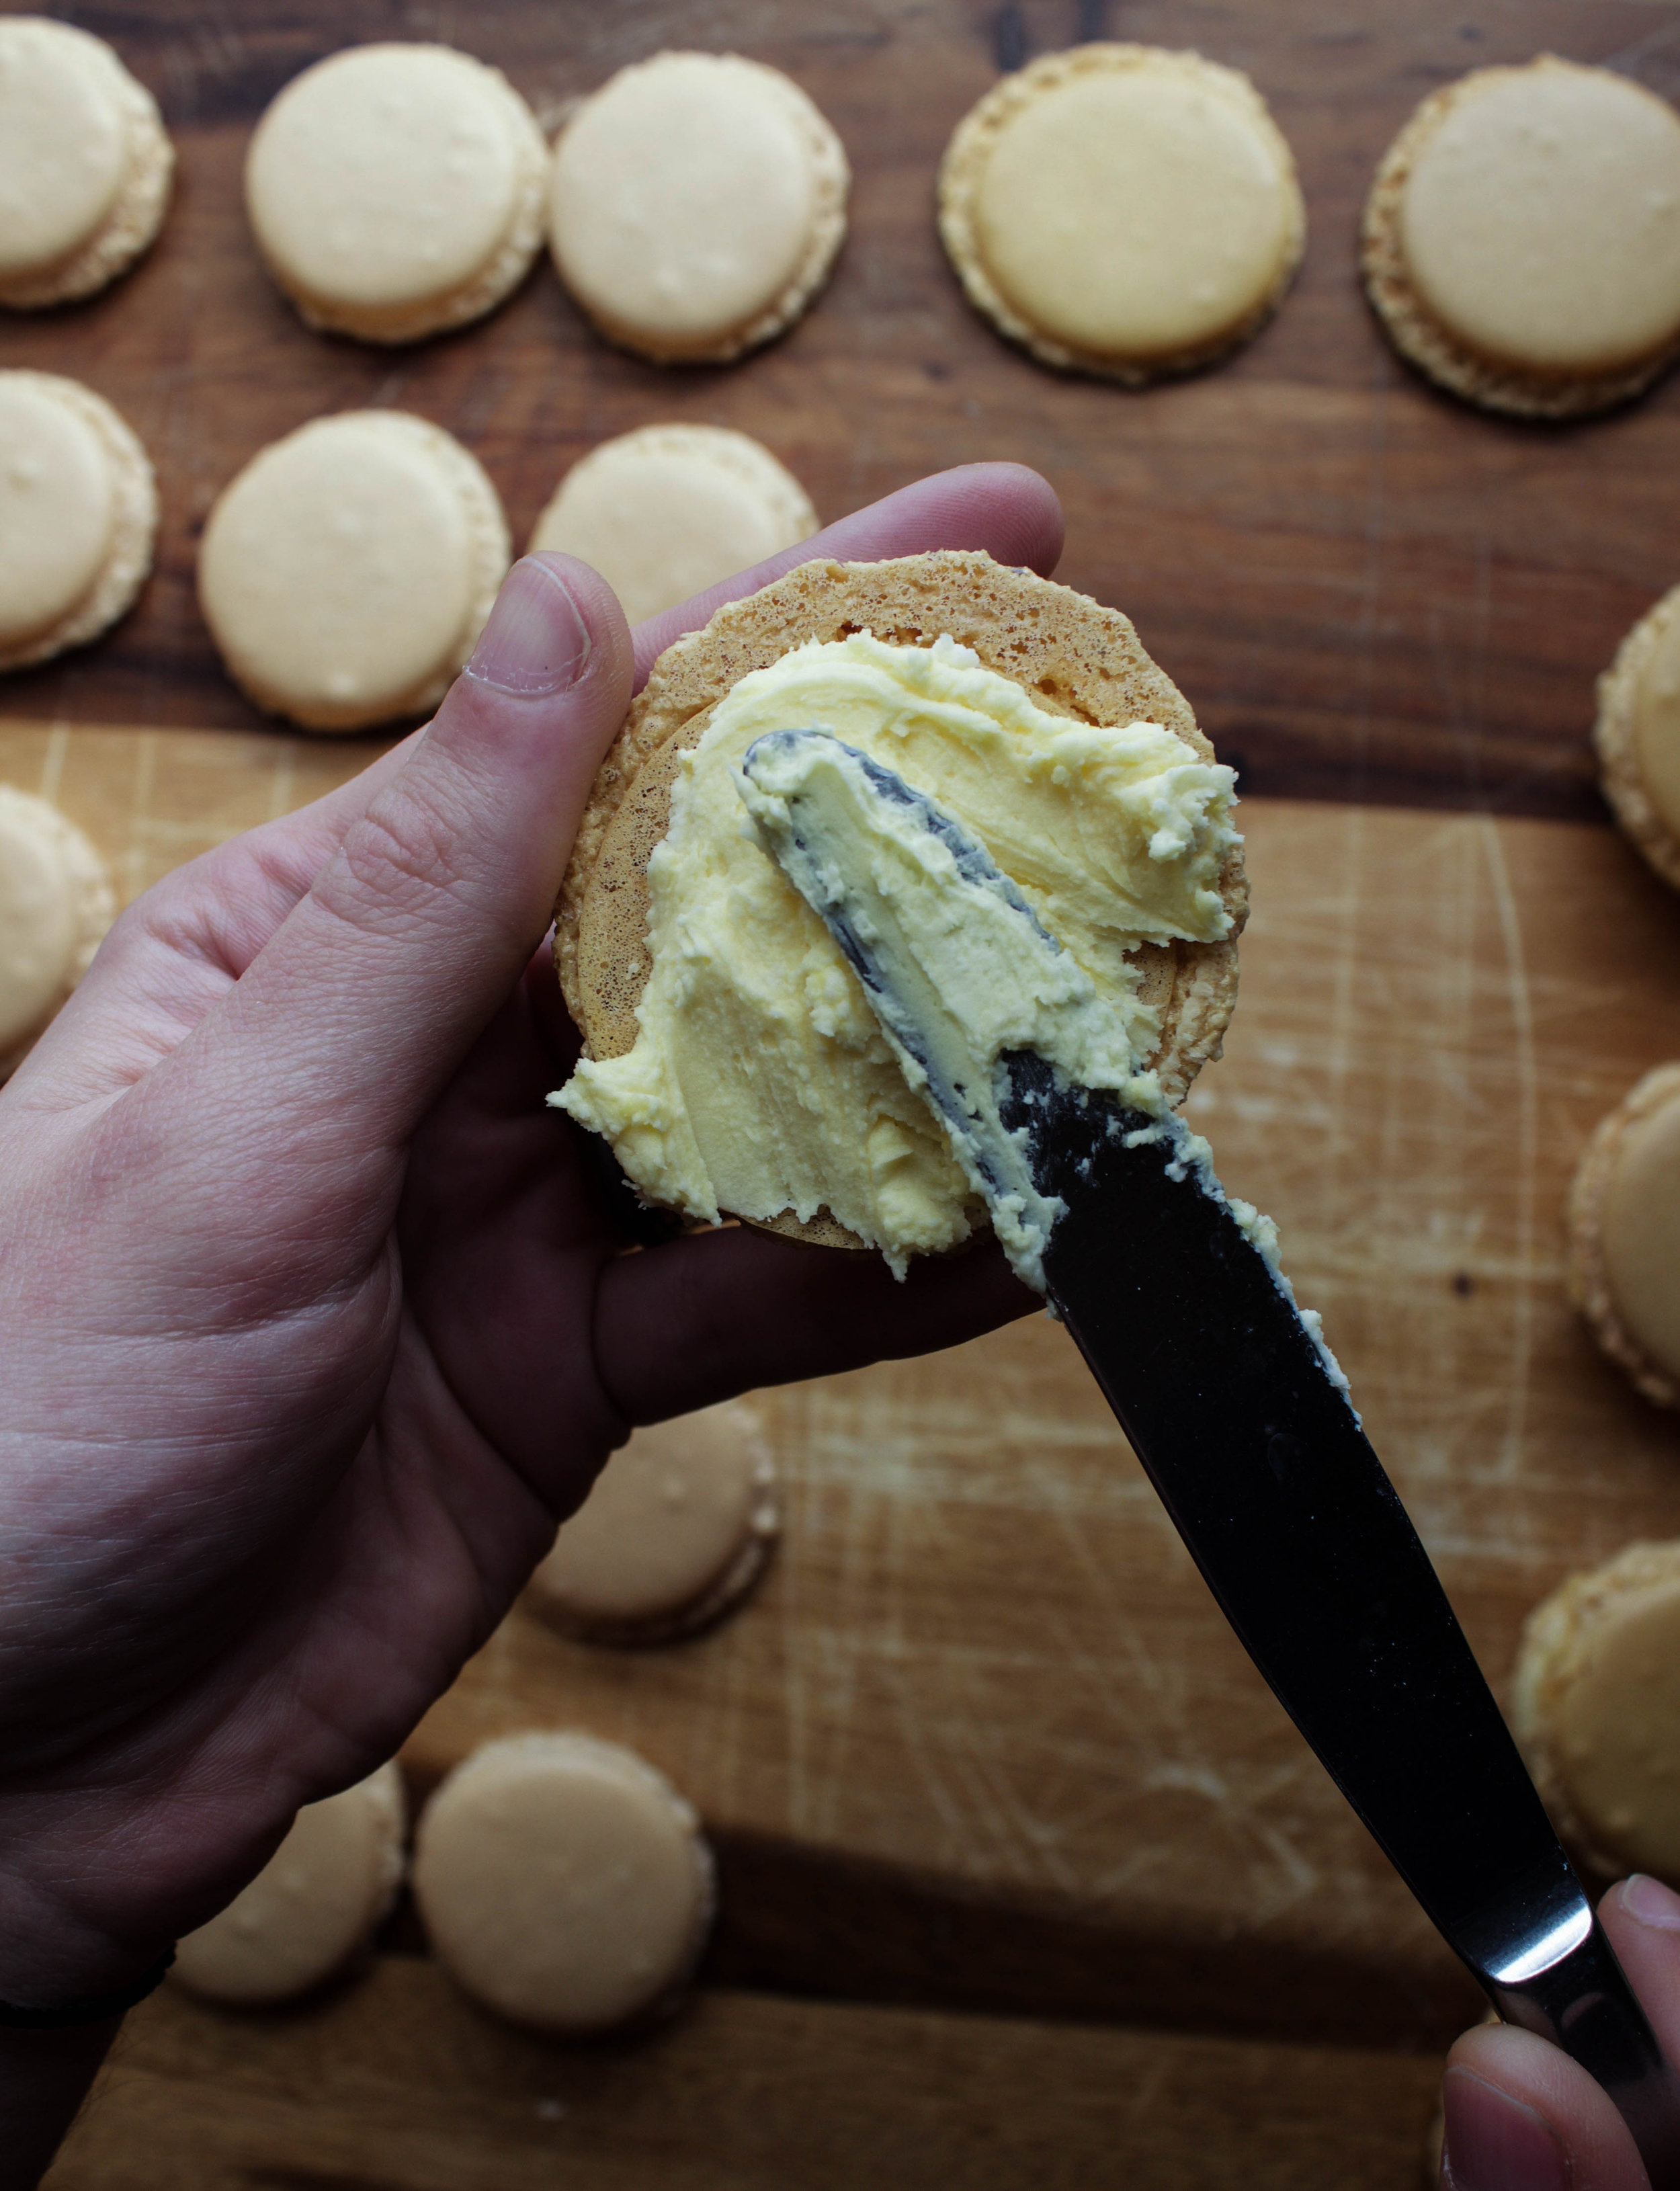
- Allow to cool completely before assembling with your filling (see notes)
- Enjoy!
Notes:
- Extract and dye amounts will vary a lot based on the potency of both products. I used 2 teaspoons of vanilla extract for one batch below, and a 1 teaspoon of lemon extract. Play around a bit, but be on the conservative side if you're nervous! I've also read that gel dyes incorporate better, so I opted for that in the batches below.
- For my filling, as you can see from my photos, I used a very simple buttercream made with 1:1:8 ratio of shortening, softened butter, and confectioner's sugar (this made enough for 2 batches with some to spare!), and then a little salt, extract, and a touch of milk to thin it out
- I think these macarons were a great size for guests or an event, but for me, I also eyeballed them and made smaller ones (about half the size) with some extra batter we had and they were wonderful, too. This recipe is very versatile, but just cut the baking time down a couple minutes for smaller ones!
Giveaway! Head on over to my Instagram for your chance to enter to win a macaron mat, too!


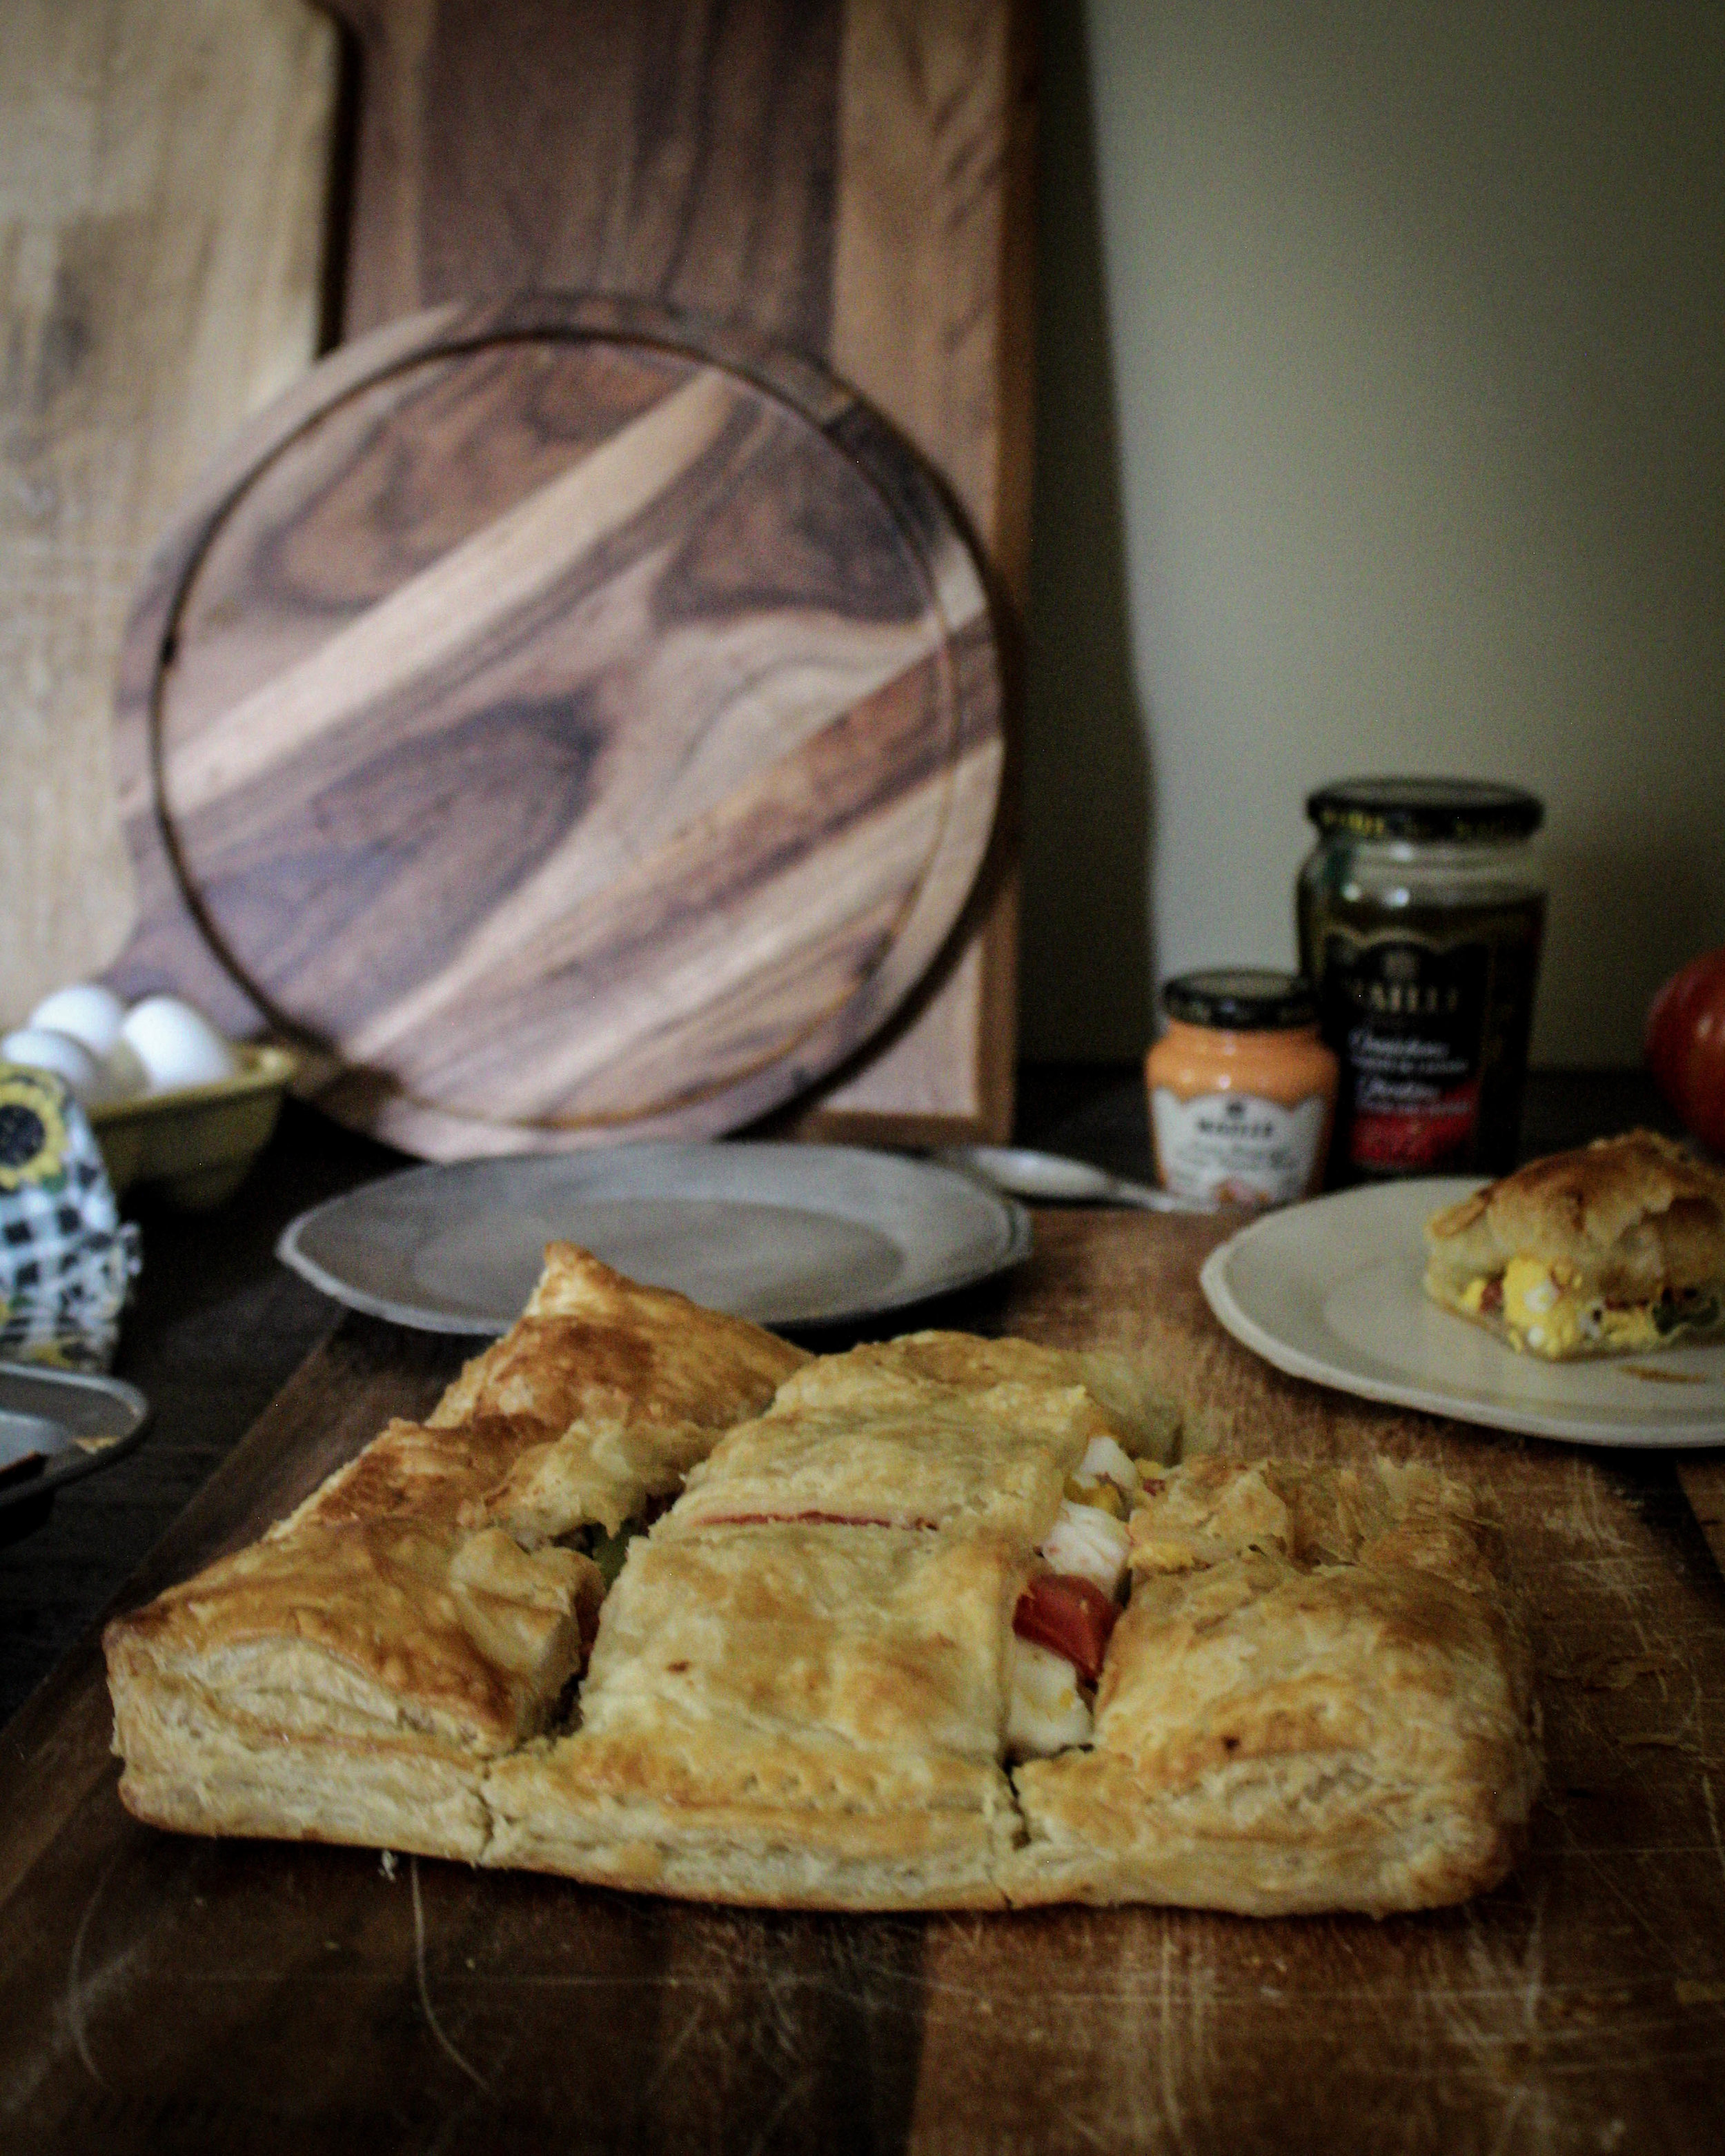
Salade Nicoise Slab Tart! In Partnership with Maille and Silpat

It's funny how refinement of a palate can mean embracing the more rustic side to food. When I first began cooking, I thought that French food was a paradigm to strive towards. I realized that the food I still loved most was uncut edges and cracked tops. In some ways, it's a lack of stress in baking, a lackadaisical approach to the homemade that still intrigues me. It's the extra butter, the egg wash that tans, and the layers of hearty flavors that I gravitate more towards.
Recipes like this are more my style, and I learned that through the trial and error of hubris and pretension when it comes to cooking.
I look to the Midwestern casseroles my mother made, how economical and in different shades of cheddar cheese and golden potatoes. I think of how they stayed on the oven top to be picked at throughout the day with fingertips and by the forkful. I think about how natural it was to look at food for how it felt and not what it always looked like. If that was a lesson my mother taught me, it was in the space between conscious need and survival instinct: get dinner on the table and get laundry done and go to sleep for tomorrow.
So I've taken what came so natural to me and added a few French elements and came up with this tart - cracked and rustic and good throughout the day. With the help of Maille and Silpat, it was an instant hint when the in-laws came over to help with yard work this weekend and I remember how far we've come together, my partner and I.
Salade Nicoise Slab Tart

Ingredients:
- 2 medium-sized Yukon Gold or similar potato
- 15-20 green beans
- 2 eggs + 1 for egg wash
- 1/4 cup oil
- 1/2 TB lemon zest
- 2 teaspoon Maille mustard (I used their acacia honey and orange blossom for a brighter flavor against the fish)
- 5 cornichon, minced (Here I used their Cornichons with cayenne chili for some heat)
- 1/2 TB shallot or garlic (or a combo), minced
- 2 cans of high quality tuna, drained
- 1/2 heirloom tomato, sliced
- 2 sheets puff pastry, thawed
Directions:
- Preheat oven to 425*F and lay out your baking sheet with your Silpat
- In a large pot of boiling salted water, simmer potatoes, green beans, and 2 eggs for 8 minutes
- Strain
- While those are boiling, whisk together oil, zest, mustard, cornichons, shallots/garlic until well blended
- Pour over tuna and stir
- Shell eggs when everything is cool to the touch
- Roll puff pastry out onto a floured work surface and lay a layer of green beans, then potatoes, egg, tuna, and tomato. Repeat with remaining ingredients, leaving about an inch margin
- In a small bowl, whisk together additional egg yolk with a TB of water and brush a bit around the edge of the bottom puff pastry
- Place second sheet on top, pressing edge with a fork and crimp a bit to keep its shape
- Brush top with more egg wash
- Bake for 30 minutes or until puffed and golden brown